
Are you looking to practice WordPress, test out themes, learn Elementor, or build project prototypes without spending money on hosting or domain registration?
Using InfinityFree, you can set up a fully functional, 100% free WordPress website. This zero-cost setup is ideal for students, beginners, freelancers, and web design learners who want a sandbox environment to practice their skills without any upfront financial commitment.
In this step-by-step guide, you will learn how to sign up for free hosting, select a free subdomain, install WordPress using Softaculous, and activate the Elementor page builder.
Why Use a Free Platform for WordPress Practice?
When you are learning web design or testing new website layouts, purchasing a paid web hosting plan and a premium domain right away isn’t always necessary. A free sandbox gives you the freedom to experiment and fail safely.
Key Benefits of Free Hosting for Beginners & Learners:
- Master WordPress Administration: Gain hands-on experience navigating the WordPress control panel, managing themes, creating posts, and configuring site settings.
- Practice Visual Design with Elementor: Build custom landing pages, test flexbox/grid containers, responsive layouts, and navigation menus.
- Experiment with Plugins: Test popular plugins (like contact forms, security tools, and SEO suites) in a risk-free environment.
- Showcase Client Prototypes & Student Projects: Build working demo sites to show instructors or prospective clients without incurring overhead costs.
What You Need For Creating a Free WordPress Website
To set up your free site on InfinityFree, you only need:
- A valid email address (or a Google / GitHub account for instant sign-in).
- A web browser and internet connection.
- 5–10 minutes to complete the setup.
Important Note on Subdomains vs. Custom Domains:
You do not need to buy a domain name. InfinityFree provides a free subdomain under extensions like .site.je, .great-site.net, .rf.gd, or .42web.io (e.g., sreehari-demo.site.je). If you already own a custom domain (e.g., yourbrand.com), you can also connect it to InfinityFree later.
Step-by-Step Tutorial: Setting Up InfinityFree & WordPress
Step 1: Create an InfinityFree Account
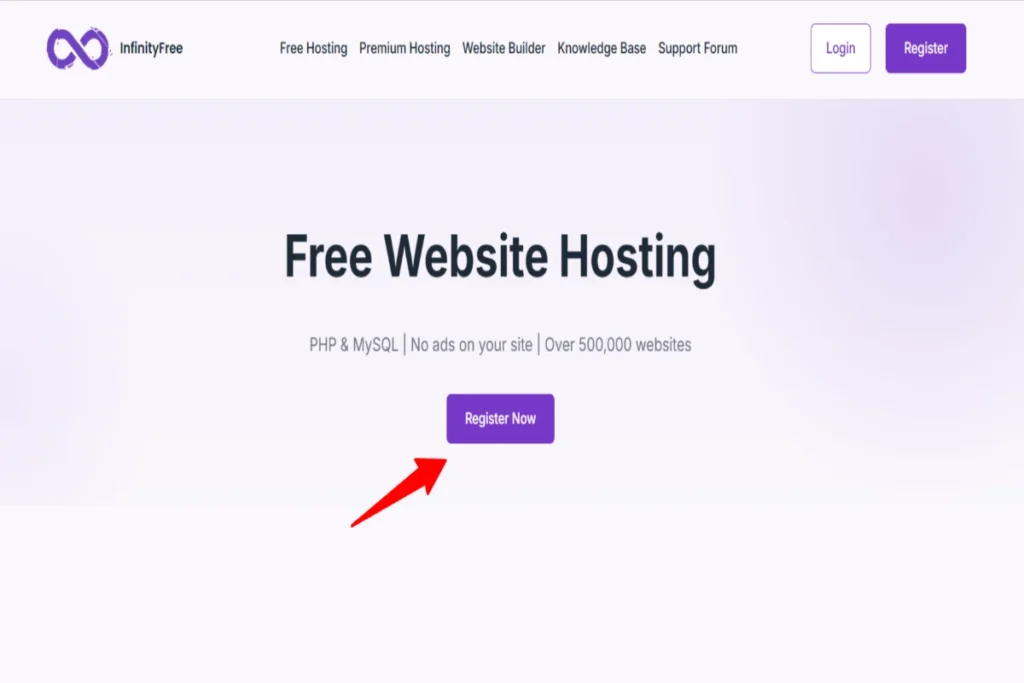
- Visit InfinityFree.com and click Register Now or Sign Up.
- You can register using your email address and password, or choose Google / GitHub Single Sign-On (SSO) for faster access.
- Agree to the Terms of Service and click Create My Account.
- Confirm your email: If you registered via email, check your inbox for a verification link from InfinityFree and click it to activate your Client Area.
Step 2: Create a Free Hosting Account & Choose Your Subdomain
- Inside the InfinityFree Client Area, locate the Hosting Accounts tab and click Create Account.
- When asked to choose a plan, select the $0 Free Plan and click Create Now.
- Complete the quick human verification check (CAPTCHA).
- Under Domain Selection, choose Free Subdomain.
- Enter your desired subdomain prefix (e.g., sreehari-demo or myproject).
- Select your preferred domain extension from the dropdown (e.g., .site.je, .great-site.net, .rf.gd, .42web.io) and click Check Availability.
- Complete the Additional Information section:
- Account Label: Enter a custom name to identify your project in the dashboard (e.g., website for demo project).
- Account Username: System-generated automatically for security.
- Account Password: Set a strong custom password or use the auto-generated one.
- Email Consent: Select I approve or I do not approve for account update emails.
- Click Create Account. Your account will be provisioned instantly.
Step 3: Access the Control Panel
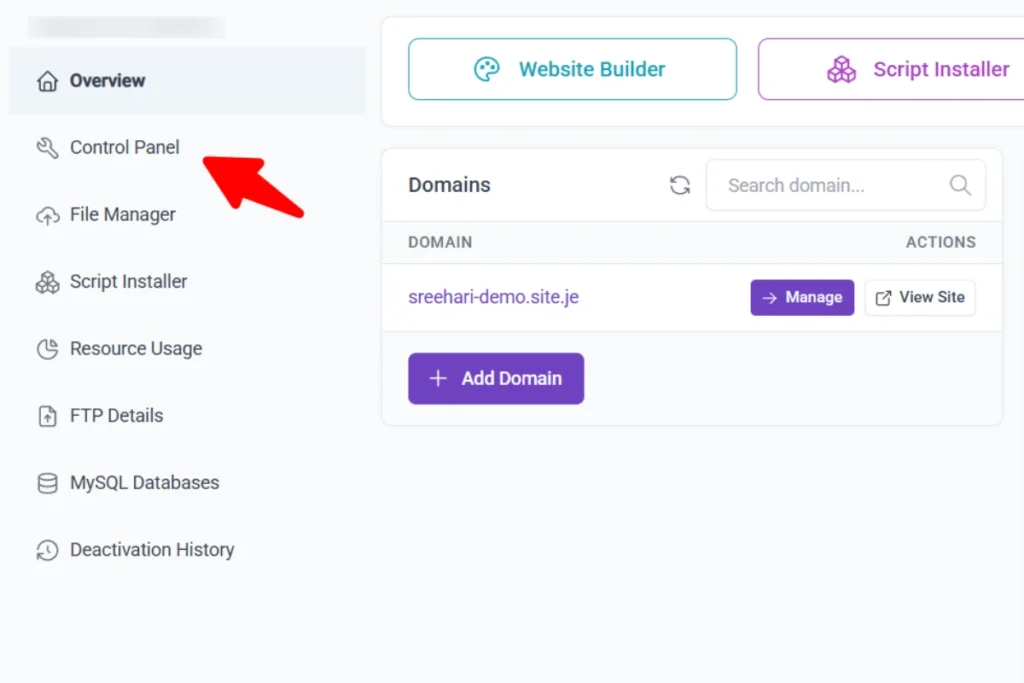
- From your hosting account overview screen, click Control Panel (or Open Control Panel).
- If prompted with an important notification regarding hosting terms and service alerts, click I Approve to load the control panel dashboard.
Step 4: Install WordPress via Softaculous Apps Installer
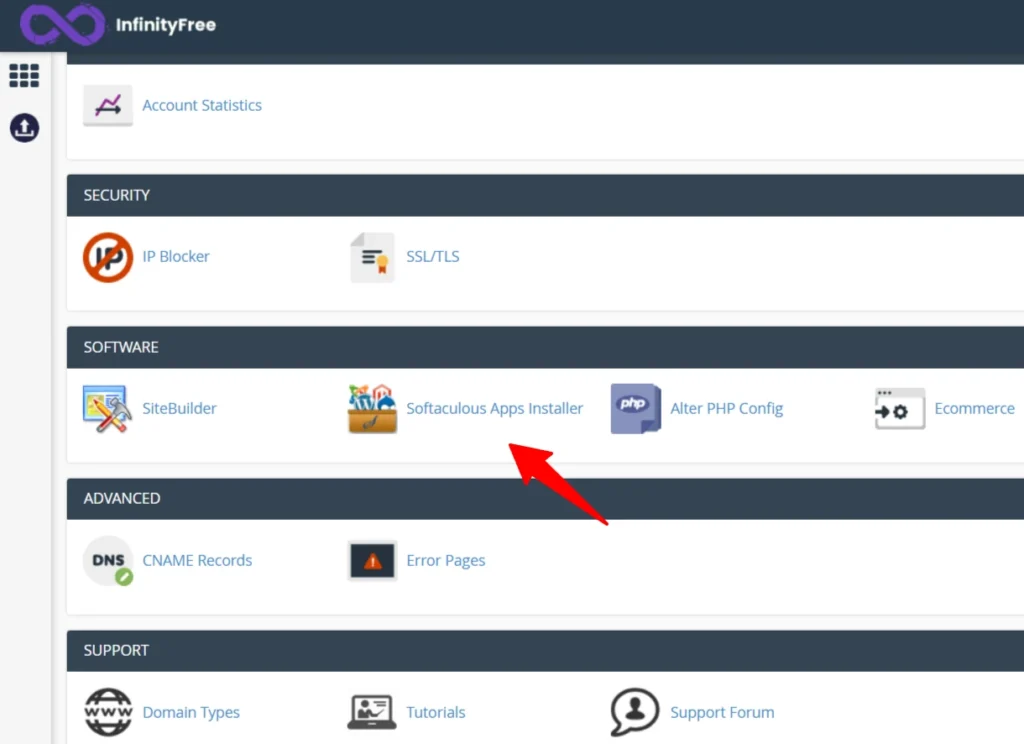
- Inside the control panel, scroll down to the Software section and click Softaculous Apps Installer.
- Softaculous will open with WordPress displayed at the top. Click Install.
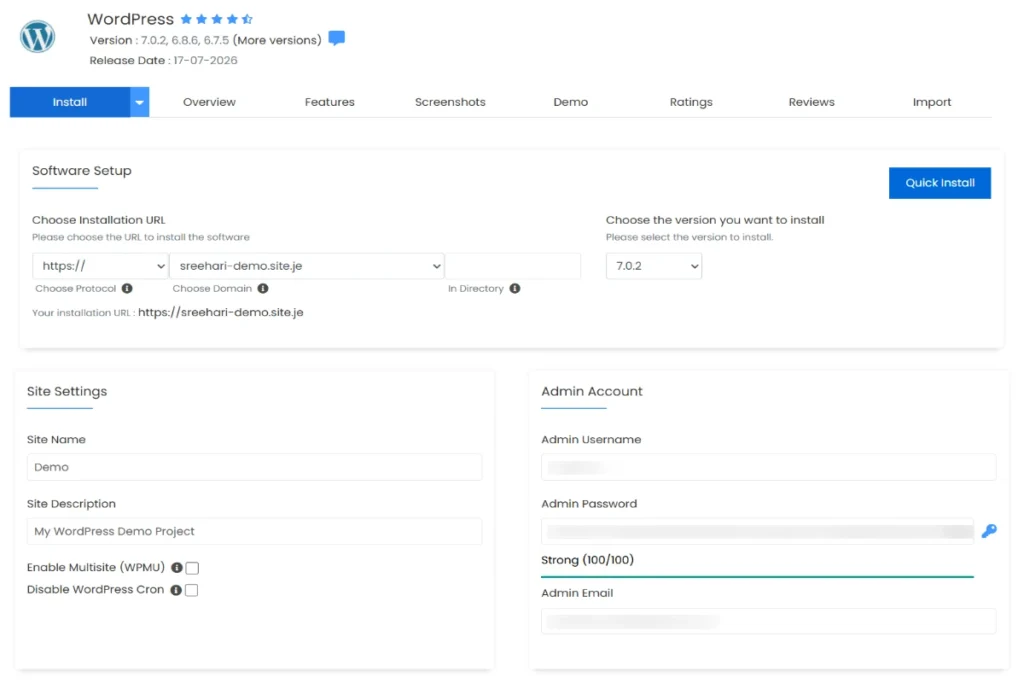
- Fill in the Software Setup form:
- Protocol: Select https:// (InfinityFree includes free automatic SSL certificates for subdomains).
- Choose Domain: Select your free subdomain (e.g., sreehari-demo.site.je). Leave the In Directory field completely empty.
- Site Settings: Enter your Site Name (e.g., Demo) and Site Description (e.g., My WordPress Demo Project).
- Admin Account:
- Admin Username: Create a unique username (avoid defaults like admin).
- Admin Password: Choose a strong password.
- Admin Email: Enter an active email address that you have access to.
- Plugins: Keep Limit Login Attempts (Loginizer) checked to enhance site security.
- Email Installation Details: Enter your email address to receive installation details.
- Click Install button. The installation will take 10–30 seconds.
Step 5: Log into Your WordPress Admin Dashboard
- To access your WordPress dashboard, add /wp-admin to the end of your subdomain URL (e.g., https://sreehari-demo.site.je/wp-admin) or click the administrative URL from Softaculous.
- Enter your Admin Username and Password.
- Click Log In to view your active WordPress Admin Dashboard!
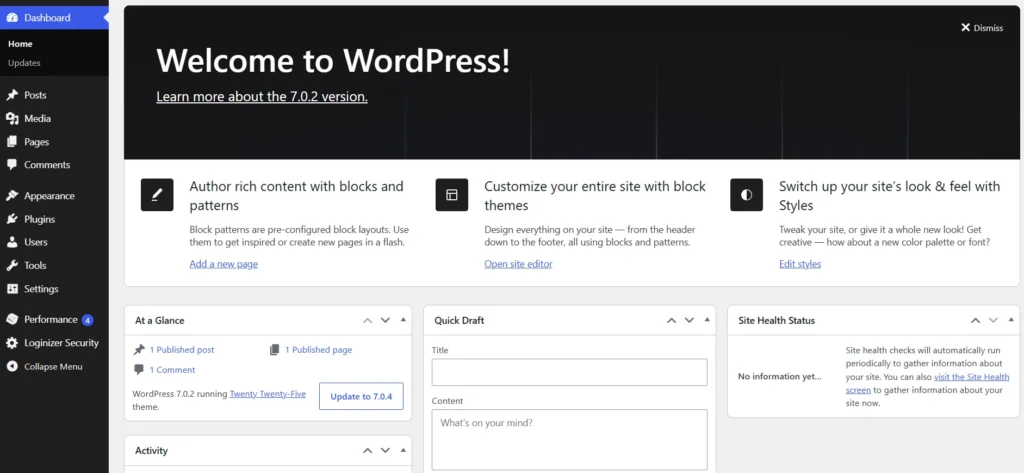
Step 6: Install Elementor Page Builder
To start designing pages visually:
- In your WordPress sidebar, go to Plugins → Add New Plugin.
- Type Elementor in the top-right search box.
- Find Elementor Website Builder, click Install Now, and then click Activate.
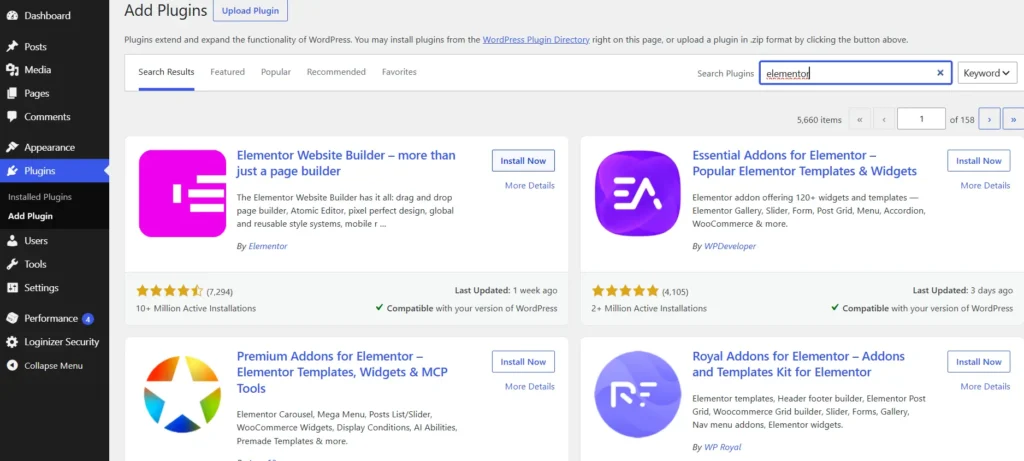
You are now ready to create pages, test flexbox containers, add widgets, and build responsive layouts!
Free Subdomain vs. Custom Domain Comparison
| Feature | Free Subdomain (e.g., sreehari-demo.site.je) | Custom Domain (e.g., yourbrand.com) |
| Annual Hosting & Domain Cost | ₹0 / Free Forever | ₹900 – ₹1,400 / year |
| Setup Time | Instant (Provisioned automatically) | Requires DNS & Nameserver pointing |
| Free SSL Certificate (HTTPS) | Included automatically | Supported |
| Best Used For | Practice, learning, student projects, client prototypes | Commercial businesses, public brand sites |
InfinityFree Plan Features Overview
| Feature / Resource | Free Plan Specification |
| Monthly Cost | ₹0.00 (No credit card required) |
| Disk Storage | 5 GB |
| Bandwidth | Unlimited |
| Auto-Installer | Softaculous (WordPress, Joomla, Drupal) |
| Advertisements | 100% Ad-Free |
| Database Support | MySQL Databases Included |
Best Practices & Troubleshooting Tips
- Optimizing Speed: Keep your practice site lightweight. Avoid installing excessive plugins simultaneously. Stick to lightweight themes like Astra, OceanWP, or GeneratePress.
- Keep Admin Credentials Safe: Ensure your admin email address is active so you can perform password resets if necessary.
- SSL / Security Alerts: If your site displays an insecure connection notice initially, give the free SSL certificate a few minutes to issue, or ensure your URL protocol in Softaculous was set to https://.
Frequently Asked Questions (FAQ)
1. Is hosting a WordPress site on InfinityFree truly free?
Yes. InfinityFree offers free web hosting with no hidden fees, no required credit card, and no forced advertisements on your site.
2. Can I use a custom domain later if I decide to buy one?
Yes. You can start with a free subdomain and later park or point a custom .com or .org domain to your InfinityFree account through the control panel.
3. Can I practice Elementor on InfinityFree?
Yes. Elementor installs and runs smoothly on InfinityFree. You can design responsive pages, practice using widgets, and build client templates.
4. Is InfinityFree suitable for high-traffic business websites?
InfinityFree is ideal for learning, development, student coursework, and client prototypes. For high-traffic production websites requiring guaranteed uptime and custom email accounts, upgrading to paid hosting is recommended.
Conclusion
Creating a free WordPress website on InfinityFree is one of the easiest ways to start learning web development. By following this guide, you now have a live WordPress installation equipped with free SSL and Elementor—giving you a risk-free environment to practice and hone your web design skills.
As you continue customizing your site, you might wonder whether WordPress is the best choice for your project long-term or if a managed site builder would suit your workflow better. To explore the pros and cons of both options, check out our detailed WordPress vs. Wix breakdown.